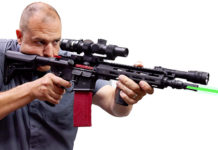
Steve Coulston takes a break from custom-building AR-15s to build a kick-ass AR-10
I like to build AR-15s… A lot. It’s like therapy for me. The majority of the ARs I have built fall into the 5.56/.223 category and a few .300 blackouts and other miscellaneous calibers that are accommodated by the AR-15 receiver sets. AR-10s on the other hand… not as many. The larger .30 caliber platform is a bit of a different animal compared to the AR-15 and has its own challenges. I figured it was time to scratch the .30 cal itch and build another AR-10 because, well, why not?
In order to get this party started right, it was imperative to pick some quality parts. I decided to go with a handful of manufactures I respect and trust.
Mega Arms:
The first AR-10 I ever owned was built around a Mega Arms receiver set. For this build I was going to use one of their barrels. I chose their 16 inch offering chambered in .308 as I wanted to build a shorter, more maneuverable rifle without entering SBR land. It uses a SR25 patterned barrel extension and has a medium contour with a 1:10 twist. It features a mid-length gas system with .750" diameter gas block seat which is allows a variety of common gas blocks to be used. Mega guarantees sub-MOA groups with match grade ammo and a competent trigger man. We shall see about that… the competent trigger man part that is…
SLR Rifleworks:
For adjustable gas blocks, SLR has always been a good option. I went with the .750", set screw Sentry 7 gas block. I have used the Sentry series in the past for AR-15 builds, but never for a AR-10 style rig. .30 cal ARs can be a little picky when it comes to gas settings. It is really easy to over gas them, so having an adjustable gas block, like the Sentry 7, is a really good idea. The Sentry 7 has 15 adjustable settings ranging from off to wide open and would prove to be a good investment for this build.
CRUX:
Sound suppression is always a good option to have. I ended up using my CRUX Nemesis30 Extreme Duty can. The Nemesis30 is only 6 inches long, 1.5 inches in diameter and weighs in at a svelte 10.0 oz. It is rated for .300 Win Mag and lesser calibers and is full auto rated on SBRs as well. The suppressor mounts to the barrel using their Precision Mounting System which uses either a brake or flash suppressor to perfectly align the suppressor with the bore. For this build I chose their Brake Suppressor Mount. This muzzle device offers a stable mounting platform for the Nemisis30 as well as effective muzzle brake performance. It is also obnoxiously loud without the suppressor installed.
Rainier Arms:
Rainier Arms products usually finds their way onto just about all my builds. It just happens. For this bad boy, I chose the Rainier Arms Ultra Match Billet Upper and Ambi Lower Mod 3 combo. This is a fairly newly released offering from Rainier Arms for the .308 market. The combination is machined from 7075 aircraft grade aluminum and is aesthetically bad ass. As the name implies the beefy lower is ambidextrous. The right hand side features a bolt release right above the magazine release. The left hand side has a magazine release lever that is located just forward of the trigger below the bolt catch. The magazine well is flared with the Rainier Arms logo prominently displayed on the port side. There are integral QD attachment points on both sides of the receiver located just behind the grip. The lower will accommodate short throw safeties which is highly recommended in this author’s humble opinion. For ease of assembly, Rainier uses set screws where possible and eliminates roll pins. The lower mates with the upper perfectly and any slop can be removed by the internal tensioning screw. The upper is minimalist in design. It lacks the forward assist and its brass deflector is faceted and angular. The Rainier Arms name is proudly displayed on the left side just under the full length 1913 Picatinny top rail.

Also utilized was the Rainier Arms Ultra Match Bolt Carrier Group. This is a DPMS pattered bolt that is shot peened, heat treated and QPQ treated. It is full auto rated and features a massive extractor and oversized lugs. The fine folks at Rainier Arms were even nice enough to head space the BCG to the Mega Arms Barrel. This is important, don’t skip this step!

CMC:
Every precision rifle needs a solid trigger. CMC Triggers has always done me right so I picked up one of their 2-Stage Flat Faced Triggers. Like all of CMC triggers it is a drop in trigger module. Super easy to install and uses their excellent Anti-Walk Pins. The trigger press is outstanding with the first stage and second stages both dropping at 2 lbs each. These are non-adjustable triggers set from the factory. They work for both AR-15 and AR-10 Mils-Spec lower receivers.

Fortis Manufacturing:
Fortis has been on the cutting edge of precision, light weight accessories for the AR-15 and AR-10 style rifles. Fortis found its place on this build in two places. First, their Hammer charging handle was selected due to its aggressive and sure grip, light weight and aesthetics. Their Black Teflon model is made of 7075 aluminum, is super slick with a smooth draw. The latch is robust and the handle has aggressive serrations. Their QD End Plate was also used for increased sling mount options.
Battle Arms Development:
I am a fan boy of Battle Arms. No shame at all. I use their safeties in almost all of my rifles. This rifle is no different. I chose their new BAD-CASS-SA-ST. This stands for Battle Arms Development, Combat Ambidextrous Safety Selector, Semi-Auto, Short Throw. Yes, that is a mouth full but this small part is bad ass and deserves recognition. As a short throw lever, it makes for super quick manipulation as it only needs to be turned 50 degrees. It doesn’t get in the way like many of the traditional 90 degree throw levers. The levers are made from bar stock steel and dovetailed together for additional strength and durability. Battle Arms Development makes a lot more than safeties. I also utilized their 7075-T6 aluminum Enhanced Magazine Release known as the BAD-EMR. The EMR has a "V" shaped serrated face for a nice tactile feel. The EMR is also slightly higher than its Mil-Spec counterpart which was a big reason why it was selected. Billet lower receivers, like the Rainer Arms Mod3 used, usually feature deeper recesses. Sometimes, I have found that the controls can get somewhat "lost" in all that aluminum. The BAD-EMR’s additional height and texture make it easy to find and manipulate.


Centurion Arms:
The Centurion Arms 14 inch CMR rail was chosen for this build. It may not be the lightest rail out there at 15.9 oz, however it is rock solid and dependable and lives up to its Naval Special Warfare roots. Made from 6061-T6 aluminum, the free floating rail features a full length 1913 Picatinny top rail but eliminates rail sections anywhere else. Instead, it features hard points to mount rail sections, covers, or hand stops as needed. It mated perfectly with the Rainier Arms upper and provided a rock solid mounting platform for bipods, light and other accessories.

Accessories:
I have typically gravitated to larger grips and the Magpul MIAD more times than not finds its way onto my black rifles. This build was no different. For a stock, I selected a Mission First Tactical Battle Link Utility Stock or BUS. It seemed appropriate for this build and honestly, it was the only stock I had on hand that was available. For a bipod I used the Accu-Tac SR5 bipod. This bipod was new to me, but was very solid. Made from billet aluminum, it is adjustable from 6 to 10 inches with spring loaded feet. Last but not least every precision rifle needs good glass. I used my tried and true Leupold ER/T 8.5-25×50 with Horus reticle mounted in the rock solid Alamo Four Star DLOC-M4X 30 mount. The DLOC system is easily installed and removed, has excellent return to zero capabilities and holds optics like a vise.


Now that the parts were assembled and the rifle built it was time to see if all these parts could make for a good shooting rifle. Assuming I did my part, I had high hopes for this 11.5 lb. rifle and set out to get some range time.
Range Work:
Testing of this rifle spanned three range sessions and three hundred rounds of a variety of ammunition. For testing I used:
- Freedom Munitions .308 150 gr. FMJ REMAN
- Gorilla .308 165 gr. Sierra GameKing
- Gorilla .308 175 gr. Sierra MatchKing
- Hornady .308 168 gr. A-Max
Magazines used were Lancer L7AWM. These are my favorite .308 magazines as they feature a sturdy polymer frame with steel feed lips. The magazines functioned flawlessly throughout the various courses of fire. The rifle however, took a little finessing to get her running properly. As noted earlier, AR-10 type rifles can be finicky buggers. The first ammunition I tried to run through the rifle was Freedom Munitions 150 gr. My first task was getting the gas system tuned so the rifle would cycle properly and lock back after the last magazine was fired. Using a 2mm hex I turned the gas system down to setting 2. I fully expected the bolt not to lock back and it didn’t. I slowly turned the gas setting up with each subsequent shot. As I crossed the midway point on the SLR adjustable gas block I started to have concerns. The bolt still was locking back after the last rounds but a new round wasn’t getting stripped off of the mag so I essentially had a single shot rifle. I continued to open up the gas block and the rifle started to exhibit signs of over gassing. That was when the first casing got stuck in the chamber. Making sure the rifle was clear I removed the stuck casing. Inspecting the brass I noticed the rim was ripped off of the case. The other spent cases had cracks in the rims. This was telling me the pressure in the barrel was still too high as the bolt attempted to extract the round. As the bolt unlocked and began to travel rear ward, the big extractor of the Rainier Arms bolt was ripping off the rim. I was able to get a few more off but had the exact same problems. The primers were also getting deformed. Not good. I went up and down the range of the adjustable gas block but never had any luck. I even swapped out the bolt carrier with an S3F .308 BCG, but the results remained the same.
Frustrated, I downloaded the Freedom Munitions rounds and loaded a single Gorilla 175 gr. Sierra MatchKing. I dropped the gas to setting four, crossed my fingers and pressed the trigger. The rifle went bang, ejected the round and the BCG locked back. Loading five more rounds, I repeated the course of fire. To my satisfaction, everything worked perfectly. Apparently, this rifle doesn’t like Freedom Munitions or at the very least prefers heavier rounds. The rifle had no issues shooting the heavier Gorilla or Honady loads and there were no other issues or malfunctions to speak of.
Over the three hundred rounds fired, three different range sessions and weather that ranged from 60 degrees down to 34 degrees. The best groups I was able to manage with the Mega Arms barrel was just shy of an inch at 100 yards. That group was achieved with Gorilla 165 gr. GameKing on a very cold Pacific Northwest November day. As my hands were pretty much frozen and I was shooing off a bipod, I considered that group acceptable, at least for me. Mega boasts their barrels will shoot under 1 MOA with match grade ammo, so that was confirmed with my groups. I am very confident if I had a lead sled or similar I could squeeze out a .75" group. Bottom line, this rifle is capable of shooting better than this author which gives me room to improve.
For those building their own AR-10 type rifle have fun with it and be patient. Sometimes it takes a while to get everything adjusted just right. Buy the best parts or rifle your budget will allow and use quality ammunition or roll your own. If you aren’t comfortable building your own or lack the tools or know-how, get a qualified gunsmith to help you put it together.

* The views and opinions expressed on this web site are solely those of the original authors and contributors. These views and opinions do not necessarily represent those of Guns & Tactics Magazine,
the administrative staff, and/or any/all contributors to this site.


[…] http://gunsandtactics.wpengine.com/ar-10-franken-build […]